Arm Rods and Posable Hands
Arm rods allow the puppeteer to control the puppet's arms and hands, an essential addition for most hand puppets.
This tutorial will teach you how to:
- Add permanent arm rods with handles to any puppet
- Add posable fingers to your puppet's hands
As a reminder, click here for a word about safety.
Materials
- 1/2-inch (12mm) sheet foam - reticulated foam, polyfoam, or soft foam
- 1/16-inch (1 to 2mm) plastic sheet - expanded PVC or styrene (cardboard or chipboard may be used, but is far less durable)
- Wire rods - 3/32-inch (2mm) music/piano wire, insulation supports, or heavy coat-hanger wire (not recommended but works in a pinch)
- 18-gauge florist wire - any wire between 16 and 22-gauge wire works, depending on your preference
- 7/16-inch (11 to 12mm) wooden dowel (1/2-inch is OK too)
- 5-minute epoxy
- Hot glue sticks
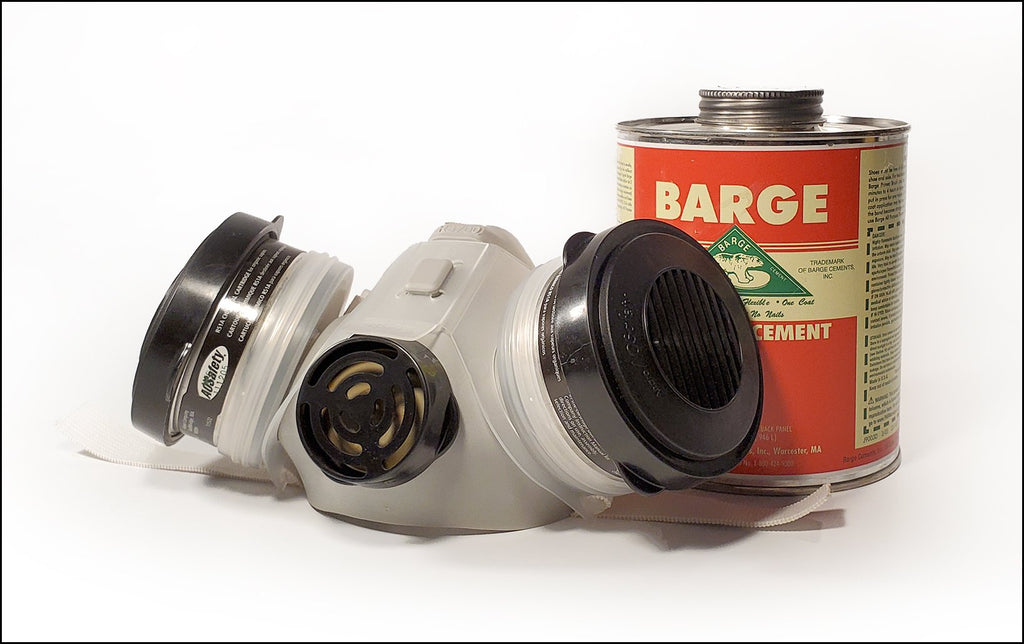
- Contact cement
- Gaffer tape
Tools
- Hobby knife
- Hobby saw
- Standard slip-joint pliers
- Needle-nose pliers
- Coarse sandpaper - 60 to 80 grit
- Hot glue gun
- Drill and drill bits
- Rotary tool with cut-off wheel for metal
Before You Begin
Sew the arm and hand. If machine sewing, trim the fabric as close to the stitches as possible to remove unnecessary bulk. Leave an opening between the wrist and the base of the "little finger," as shown.

Make the Patterns
You will need three patterns. One, you already have. The second one is based on the first, and the third on the second.
- Fabric Hand Pattern - The hand shape of your original arm and hand pattern. You'll just need the shape of the hand (not the arm) to create the next pattern.
- Foam Hand Pattern - Draw a line on the inside of the Fabric Hand Pattern offset by 1/8 inch (3mm).
- Palm Support Pattern - Draw a line on the inside of the Foam Hand Pattern offset by 1/4 inch (6mm). Do not include the fingers or thumb. The pattern should fill the palm of the hand only. Mark points that line up with the centerline of the fingers and thumb and about 1/8 inch from the pattern's edge.
Here are the three pattern shapes as they relate to each other:

Prepare the Pieces
Prepare the pieces for assembly.
3-1
Use the hobby knife to cut the hands from the sheet foam. Click here to learn how. You'll need two foam hand pieces for each hand.
3-2
Cut the palm support from the thin plastic sheet with the hobby knife or scissors. Insert and twist the point of the knife in the marked locations to create small holes for the florist wire. Then, sand both sides of the support to roughen up the surface, ready for gluing.
3-3
Cut a length of florist wire for each finger and thumb. The length is specific to the puppet's hand, so use the Foam Hand Pattern as a guide. Make them a bit longer than the fingers and thumb to ensure plenty of wire to work with.
3-4
Cut the wire rod at 15 inches (380mm) in length. The final length of the rod can be adjusted later.
Fold a small piece of sandpaper and run it along the length of the rod to roughen up the surface. Then clean it with rubbing alcohol. The rod should be clear of any grease or grime, ready to be glued.
Use a pair of standard pliers or a bench vise to bend one end of the wire rod as shown.
In this case, the rod was marked at 1 1/2 inches (38mm) from the end. About a 1/2 inch (13mm) was bent at an approximate 45° angle and then bent again at a 90° angle on the 1 1/2-inch (38mm) mark.

3-5
Cut the wooden dowel to length with the hobby saw. The length is your decision, but we tend to like between 4 and 5 inches (100 to 130mm). Drill a hole off-center, and an inch deep, in one end of the dowel. Use a drill bit slightly larger than the thickness of the rod, or if the bit and the rod are the same size, bore out the hole so the rod fits loosely, allowing enough room for the glue to do its work in the next steps.

Puppet-Building Principles to Ponder
- What is the purpose of the second bend (the 45° bend) on the arm rod? Why not just bend the rod once at 90°? Why bend it at all?
- Why is the hole drilled in the end of the wooden handle off-center?
Assemble the Understructure
4-1
Use the needle-nose pliers to bend a loop at the end of each piece of florist wire.
4-2
Lay one foam hand flat with the palm support on top in the correct position. Center each of the wire pieces on the foam thumb and fingers with the loop end toward the tip and the other end in line with its respective hole in the palm support. Mark, bend, and cut the end of each wire to create a hooked shape as shown.
4-3
Insert each hooked end through the appropriate hole in the palm support and pinch with the pliers to keep the wires from moving.


4-4
Hot glue the florist wire (in the front and back where it attaches to the palm support) and the arm rod in their places. Be generous with the glue.

4-5
Now, permanently sandwich this understructure between the two foam hands with contact cement. Be careful to line up the edges of the foam and to ensure the florist wire runs down the center of the thumb and fingers as you glue the top foam hand in place.

Puppet-Building Principles to Ponder
- Why use hot glue to secure the wires and rod to the palm support? Could an epoxy be used? Would one be more durable than the other?
- Note where the arm rod exits the foam hand, just in front of the wrist. Is this position important? Would moving the exit location forward or backward make any difference?
4-6
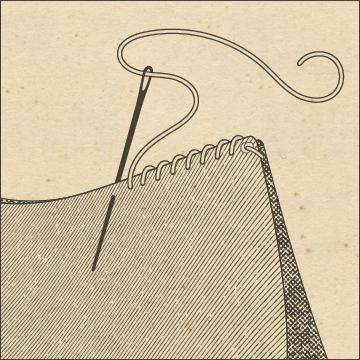
To round the shape, apply contact cement to the edges of the foam hand. Then carefully pinch the outer edges together. You may find it helpful to use a straight pin or an upholstery needle (as shown) to press down the foam between, bringing the outer edges together.


Cover the Hand
5-1
Insert the completed foam hand into the fabric hand through the opening. Close up the seam with a ladder stitch.


Add the Handle
6-1
First, cut the arm rod to length. Typically, we prefer around 10 inches (255mm) from the wrist to the top of the handle, although this may be adjusted to the proportions of a specific character. Measure 11 inches (280mm) down from the rod's exit point, mark, and cut. (Remember, one inch of the rod will be slipped inside the wooden dowel.)
Puppet-Building Principles to Ponder
- Which is better - a longer or shorter rod? Would changing the length of the arm rod affect the performance of the puppet? If so, how?
6-2
Use a rotary tool with a cut-off wheel to add several notches to the end of the arm rod. Stay within an inch (25mm) from the end of the rod. The notches will add a mechanical connection to the adhesive bond between the rod and the wooden dowel in the next step.


6-3
Epoxy the rod in the hole at the top of the dowel. Orient the handle with the hole towards the front, in the direction of the fingers.

Puppet-Building Principles to Ponder
- How might using different materials affect the function or durability of the final product?
- How could you alter this basic design to create a hand that may be posed in even more natural positions?
- Can you think of other ways to attach the rod to the handle?

You're finished! Construction is complete. You may also decide to wrap the wooden handle with gaffer tape, or not. It's up to you. You're now ready to attach the puppet's arm to its body. Keep building!